

This is a make it yourself guide to build your own CD Spectroscope with which you will be able to easily make out the Sodium D-lines with the help of a street light.

This is what I got with a crude instrument that I made, I promise you’ll end up with a better one!
Before we jump into the making of the spectroscope, let us take a look at the concepts and phenomena involved in the experiment! After all, a lil’ background does no harm! Although I’m no expert on this subject, I’ll do my best to be as lucid and factually perfect as possible! To skip to the procedure, please scroll down.
Diffraction : It is described as the apparent bending of waves around small") obstacles and the spreading out of waves past small openings.
obstacles and the spreading out of waves past small openings.
Consider a plane wave front as shown in the figure. When it encounters an obstacle which is of the same order as its wavelength, it diffracts or spreads out. When the diffraction pattern of white light is observed, one can make out its constituent colours, as each constituent colour diffracts in a different way which is dependent on its wavelength.

Optical instruments called diffraction gratings, have a periodic structure in the form of closely spaced parallel lines or divisions which splits and diffracts light into several beams travelling in different directions. For example, a particular grating can even have 6000 lines/cm!
Just like prisms, they split up a white light source as I have mentioned earlier.
Around us, we see lots of phenomena due to diffraction, and although it might sound pretty much theoretical, diffraction is the phenomena that has lots of real life applications. The surface of holograms that one sees are somewhat like a diffraction grating itself! Also, you must have come across these tiny floating grids or ‘maps’ in front of your eyes, that is itself a product of diffraction!!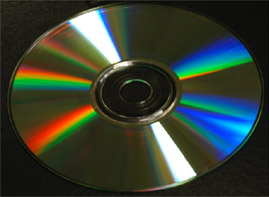
Compact Disks or CDs as we better know them, are just another example or it. Do you know a CD stores data? Well, it’s in the minute grooves on its surface that are etched with the data. These grooves which are densely packed, run in spirals. A blank CD makes for a real good diffraction grating!
Now that we know the basics about the devices that we are going to use, let us take a jump into the very much ‘exciting’ atomic realm!
To keep it simple for everyone, let’s start out with the fact that electrons are particles that orbit around the nucleus of an atom. These electrons, as Niels Bohr showed, orbit around the atomic nucleus in stable paths. Each of such path possible had a definite ‘energy’ value assigned to it, and only those paths were permitted wherein the energy value was a integral multiple of the energy related with the 1st energy level or orbit.

According to him, electrons which travel around these defined paths do not loose energy over time (Due to the wave nature of particles, electron orbiting nuclei form standing waves wherein the transfer of energy is null). The only way in which a electron can ‘jump’ up or down a energy level is when it absorbs or emits energy. And as this energy is most commonly shared in the form that we all are familiar with. And that form of energy is nothing but light itself!
So in short, light ‘excites’ an electron and makes it ‘jump’ to a higher energy level, or an electron emits light or energy and jumps down to a lower energy state. Remember that the lower the energy is, the more stable the electron is!
Now, comes the application part! Most of the street lights that we see around us, at least the yellow ones, are Sodium vapour lamps. And the light that we see comes from the very same excitation of the electrons present in the Sodium in the lamp. As we know, the number of electrons present in Sodium is 11, and its electronic configuration can be represented in simple terms as (2,8,1). For those who indulge in higher studies it goes as 1s2 2s2 2p6 3s1. What is more of our concern is that the lone electron in the 3s subshell jumps up when exited to the 3p subshell. When it makes an effort to come down again, it releases energy in the form of light, the very same light that illuminates most of our streets!!!
Also, one should make a note of the fact that every element has a unique energy absorption and emission spectrum by virtue of their unique electronic configuration! This fact helps us a lot in identifying elements due to their spectra and this technique is heavily employed in astrochemistry!
Given below is a continuous spectrum, and the absorption spectrum of Sodium.


In the above spectrum, you can see two distinct yellow lines separated by a small distance. These lines are due to the light that is given out by the electrons when it jumps to a lower energy state. using the spectroscope, we will see the very same lines, we will get an insight into the ‘excited dances’ of the atomic world! Aren’t you excited too?? Well, hope not bored!
Let’s Begin!
Things that you will need :


 Once you do this, hunt for an Sodium or Mercury vapour lamp. The orange lamps out on the streets are of the Sodium variety and can make a good lighting source for this demo. Now, try to find a dark place from where you can look at the source of light. Once you are ready, hold the CD in front of one eye and close the other eye. Try to align your eye, the light and the hole in the CD in a straight line, this is the trick to get a perfect ring! I had found it out by trial and error and it was really interesting to do so! Once you have this alignment, hold the CD at your arm’s length and draw it near and more near to your eyes until you end up with the kind of pattern that you saw in the first image of the post! And there! You will have unlocked one of the most potent tools used for identifying various elements!
P.S. : A special mention to my cousin Suyesh Prabhugaonkar for clicking the photos and helping me make the CD spectroscope.
(Also posted on www.enli8en.com/rajkunkolienkar/DIY--Spectroscope-from-a-CD.php)

This is what I got with a crude instrument that I made, I promise you’ll end up with a better one!
Before we jump into the making of the spectroscope, let us take a look at the concepts and phenomena involved in the experiment! After all, a lil’ background does no harm! Although I’m no expert on this subject, I’ll do my best to be as lucid and factually perfect as possible! To skip to the procedure, please scroll down.
Diffraction : It is described as the apparent bending of waves around small
") obstacles and the spreading out of waves past small openings.
obstacles and the spreading out of waves past small openings.Consider a plane wave front as shown in the figure. When it encounters an obstacle which is of the same order as its wavelength, it diffracts or spreads out. When the diffraction pattern of white light is observed, one can make out its constituent colours, as each constituent colour diffracts in a different way which is dependent on its wavelength.
Optical instruments called diffraction gratings, have a periodic structure in the form of closely spaced parallel lines or divisions which splits and diffracts light into several beams travelling in different directions. For example, a particular grating can even have 6000 lines/cm!
Just like prisms, they split up a white light source as I have mentioned earlier.
Around us, we see lots of phenomena due to diffraction, and although it might sound pretty much theoretical, diffraction is the phenomena that has lots of real life applications. The surface of holograms that one sees are somewhat like a diffraction grating itself! Also, you must have come across these tiny floating grids or ‘maps’ in front of your eyes, that is itself a product of diffraction!!
Compact Disks or CDs as we better know them, are just another example or it. Do you know a CD stores data? Well, it’s in the minute grooves on its surface that are etched with the data. These grooves which are densely packed, run in spirals. A blank CD makes for a real good diffraction grating!
Now that we know the basics about the devices that we are going to use, let us take a jump into the very much ‘exciting’ atomic realm!
To keep it simple for everyone, let’s start out with the fact that electrons are particles that orbit around the nucleus of an atom. These electrons, as Niels Bohr showed, orbit around the atomic nucleus in stable paths. Each of such path possible had a definite ‘energy’ value assigned to it, and only those paths were permitted wherein the energy value was a integral multiple of the energy related with the 1st energy level or orbit.
According to him, electrons which travel around these defined paths do not loose energy over time (Due to the wave nature of particles, electron orbiting nuclei form standing waves wherein the transfer of energy is null). The only way in which a electron can ‘jump’ up or down a energy level is when it absorbs or emits energy. And as this energy is most commonly shared in the form that we all are familiar with. And that form of energy is nothing but light itself!
So in short, light ‘excites’ an electron and makes it ‘jump’ to a higher energy level, or an electron emits light or energy and jumps down to a lower energy state. Remember that the lower the energy is, the more stable the electron is!
Now, comes the application part! Most of the street lights that we see around us, at least the yellow ones, are Sodium vapour lamps. And the light that we see comes from the very same excitation of the electrons present in the Sodium in the lamp. As we know, the number of electrons present in Sodium is 11, and its electronic configuration can be represented in simple terms as (2,8,1). For those who indulge in higher studies it goes as 1s2 2s2 2p6 3s1. What is more of our concern is that the lone electron in the 3s subshell jumps up when exited to the 3p subshell. When it makes an effort to come down again, it releases energy in the form of light, the very same light that illuminates most of our streets!!!
Also, one should make a note of the fact that every element has a unique energy absorption and emission spectrum by virtue of their unique electronic configuration! This fact helps us a lot in identifying elements due to their spectra and this technique is heavily employed in astrochemistry!
Given below is a continuous spectrum, and the absorption spectrum of Sodium.

In the above spectrum, you can see two distinct yellow lines separated by a small distance. These lines are due to the light that is given out by the electrons when it jumps to a lower energy state. using the spectroscope, we will see the very same lines, we will get an insight into the ‘excited dances’ of the atomic world! Aren’t you excited too?? Well, hope not bored!
Let’s Begin!

Things that you will need :
- A blank Compact Disc
- A tape (preferably packing tape)
- A pair of scissors
- A smile on your face cause you are going to enter the quantum realm!
The first step would be to scratch a line along the radius on that side of the CD where the silver coating is.
Once you do that, take a long strip of tape and paste it along the scratch. The wider the tape is, the better the quality of the stripped CD.

Now that you have done so, apply some pressure over the taped area so that when you try to peal it off, it comes out with ease and this also prevents a mess. Make it a point that you do not get a large amount of fingerprints on the CD. 

In this photo, you can see how the CD will look after you repeat the procedure. While doing so, try to overlap the tape that you apply on a small portion that you have already peeled off.

Within no time, you will have the whole CD peeled off! And what you will end up is something like this. A transparent disc and a ball of tape.

Do leave me a message on Facebook or in the comments section below telling me about potential improvements and how your spectroscope ended up! I’ll be glad if you capture the image that you get ; do mail it to me at thebiggerbang(at)ymail(dot)com. I shall surely upload it here on my blog!Mid@$Touch aka thebiggerbang
Promise
P.S. : A special mention to my cousin Suyesh Prabhugaonkar for clicking the photos and helping me make the CD spectroscope.
(Also posted on www.enli8en.com/rajkunkolienkar/DIY--Spectroscope-from-a-CD.php)

1 comment:
With all the CDs I have, the label surface will not simply come off by peeling it off with some sticky tape. It's on there pretty good. What I did was to cut a quarter section out of the CD and then split it apart, like opening a sandwich.
Post a Comment